# Finally! The Secret of Testing in React Native Revealed

> Everything you need to know about automated testing in React Native: why they pay off in reliability, speed and analysis, and how to implement them.

- HTML version: https://tiagodanin.com/post/finally-the-secret-of-testing-in-react-native-revealed/
- Site index for AI assistants: https://tiagodanin.com/llms.txt

- Date: 2022-09
- Language: English
- Tags: React Native, Testing, Article
- Originally published at: https://medium.com/idopterlabs/finalmente-o-segredo-dos-testes-no-react-native-foi-revelado-d997ffa82768

![Finally! The Secret of Testing in React Native Revealed](/images/posts/finalmente-o-segredo-dos-testes-no-react-native-foi-revelado/cover.png)

## Introduction

This article covers the implementation of automated tests in applications built with React Native.

## Reasons to Use Automated Tests
![Automated testing diagram](/images/posts/finalmente-o-segredo-dos-testes-no-react-native-foi-revelado/testing-01.png)

There are several reasons to use automated tests, among which three points stand out: reliability, speed, and analysis.

### Reliability

An important point when running tests is getting feedback that a flow is actually working as expected, with the inputs and outputs being executed as planned — that is, the returns match what was previously written.

### Speed

As the features of an application grow, more tests are needed, and performing them manually every time a change is made starts to become unfeasible. Instead, automation will always run the same written tests, without skipping a step or missing one of the tests, in much less time than manual execution.

### Analysis

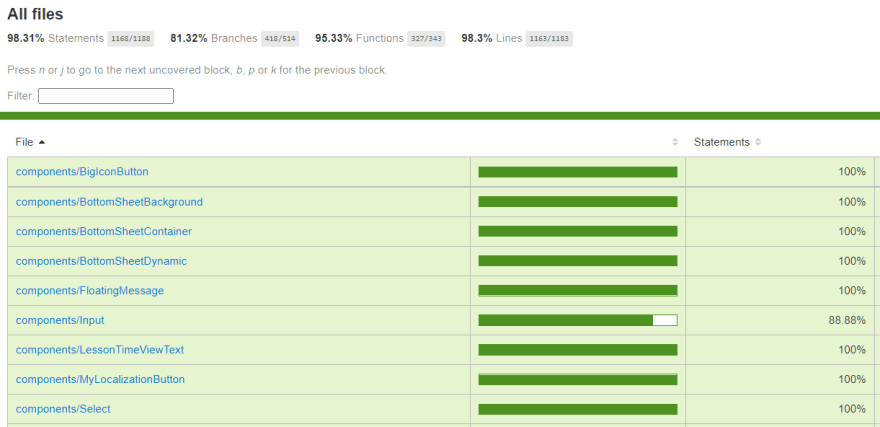
Various reports can be generated from automated test execution, such as coverage reports or reports of passed tests that can be used as software quality control. Furthermore, the tests themselves function as a kind of documentation. For example, if we need to know what happens when there's a wrong password input, we just look at the test that references that action.

## Tools
![Testing tools for React Native](/images/posts/finalmente-o-segredo-dos-testes-no-react-native-foi-revelado/testing-02.png)

There are many tools for testing mobile apps, but this article works with two: Jest and the React Native Test Library.
![Jest - testing framework](/images/posts/finalmente-o-segredo-dos-testes-no-react-native-foi-revelado/testing-03.png)

### Jest

Jest is a testing framework maintained by Meta, the same company behind React Native development, which makes it much easier to use, configure, and include features, since its development is always aligned with the products it's used in.
![React Native Test Library](/images/posts/finalmente-o-segredo-dos-testes-no-react-native-foi-revelado/testing-04.png)

### React Native Test Library

The second tool works as a utility that will facilitate testing, initially developed by the Test Library organization itself, and later migrated to Callstack, the organization responsible for various widely used libraries in React Native, such as React Native Paper.

## Configuring Jest
![Configuring Jest in the project](/images/posts/finalmente-o-segredo-dos-testes-no-react-native-foi-revelado/testing-05.png)

Right away we'll need to install the tool packages in the project. We can do this through NPM or Yarn:

```
$ yarn add @testing-library/jest-native @testing-library/react-hooks @testing-library/react-native @types/jest babel-jest jest
```

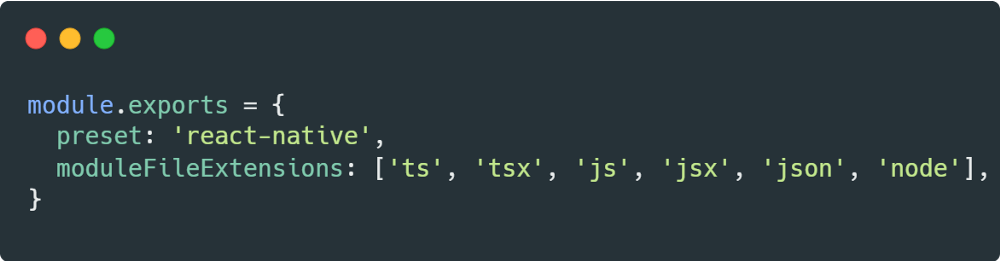
And at the root of the project, create a configuration file for Jest:

```javascript
// jest.config.js
module.exports = {
  preset: 'react-native',
};
```

As mentioned earlier, Jest is already prepared for React Native, so we just need to tell it in the `preset` that the default configuration we want to use is react-native.

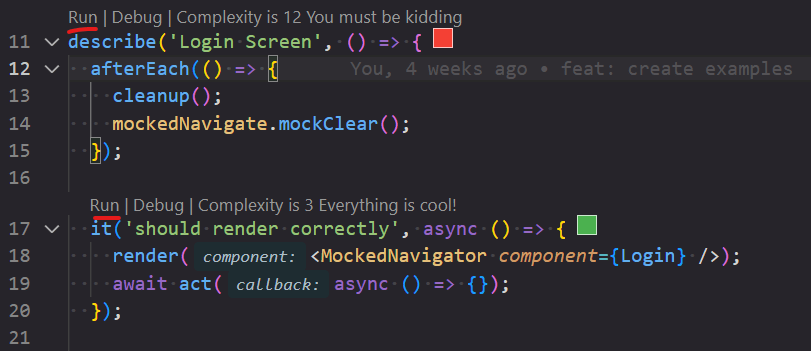
To run the tests you can use the jest command in the terminal or the VS Code Jest Runner extension, which adds a `run` button to your test scopes.

## Creating Tests
![Test file structure](/images/posts/finalmente-o-segredo-dos-testes-no-react-native-foi-revelado/testing-06.png)

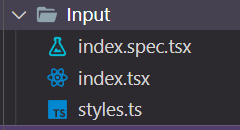
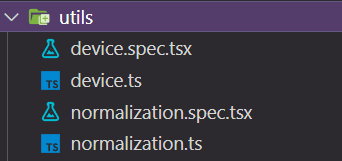
Tests need to be created in a separate file. This file can be located inside a `__tests__` folder, or files ending in `.test.js`, `.test.ts`, `.test.jsx`, `.test.tsx`, `.spec.js`, `.spec.ts`, `.spec.jsx`, and `.spec.tsx` — this is given by the default regex rule and can be changed in Jest settings via the testMatch field.

At IdopterLabs, the convention of placing tests next to the main file of the component, screen, or utility that will be the test scope was adopted.

This makes it easy to know where tests are missing, because when you access a component folder, for example, it's clear whether or not the test file exists.

![Writing tests with Jest](/images/posts/finalmente-o-segredo-dos-testes-no-react-native-foi-revelado/testing-07.png)

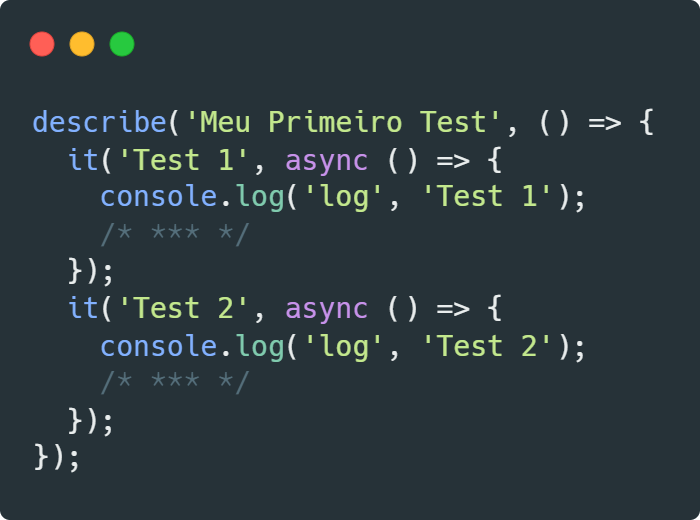
To write the tests, we'll initially need the following structure in our file:

```typescript

describe('Button', () => {
  it('should render without crashing', () => {
    render(<Button />);
  });
});
```

Where the first parameter of `describe` we describe who our scope is, and in the first parameter of `it` the description of the test that will be performed.

**NOTE:** `it` can be replaced by `test` in its place — the only difference is how it reads.
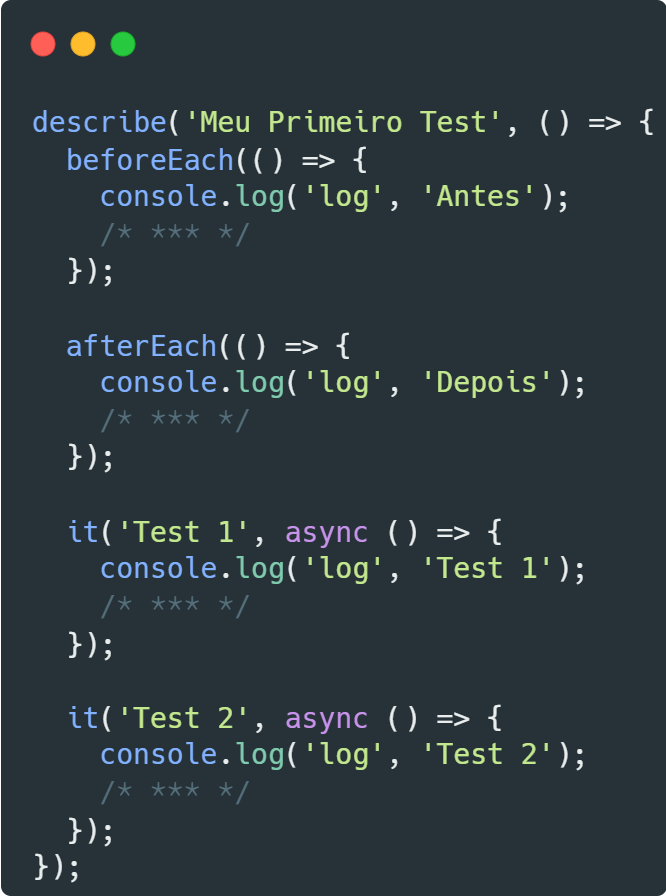
![beforeEach and afterEach callbacks](/images/posts/finalmente-o-segredo-dos-testes-no-react-native-foi-revelado/testing-08.png)

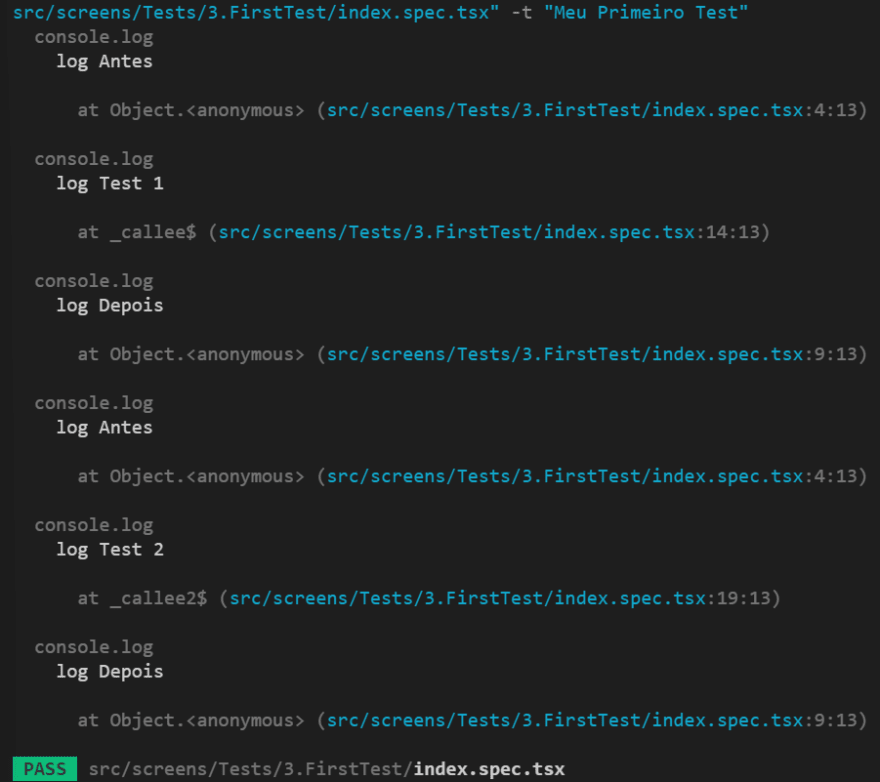
When we need to execute some task before or after each test, we can use the `beforeEach` and `afterEach` callbacks respectively.

```typescript
describe('Button', () => {
  beforeEach(() => {
    console.log('antes de cada teste');
  });

  afterEach(() => {
    console.log('depois de cada teste');
  });

  it('should render without crashing', () => {
    render(<Button />);
  });
});
```

![Example Button component](/images/posts/finalmente-o-segredo-dos-testes-no-react-native-foi-revelado/testing-09.png)

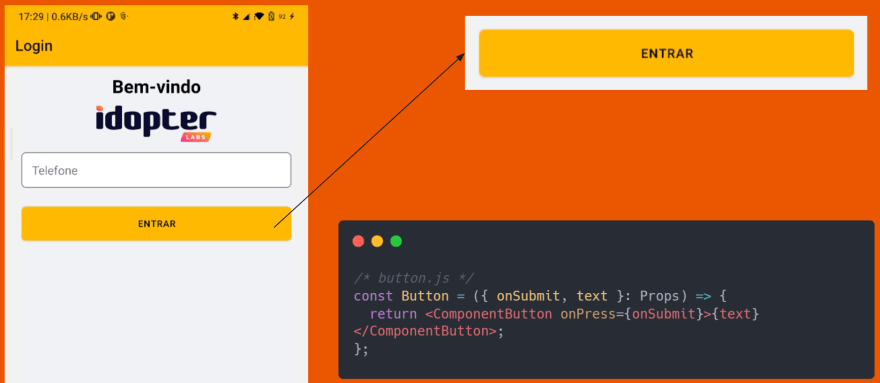
Now let's actually write a functional test. We have the following screen with a button component:

```typescript
// components/Button/index.tsx

interface ButtonProps {
  onPress: () => void;
}

const Button: React.FC<ButtonProps> = ({ onPress }) => (
  <TouchableOpacity onPress={onPress}>
    <Text>Clique aqui</Text>
  </TouchableOpacity>
);

export default Button;
```

![Testing component rendering](/images/posts/finalmente-o-segredo-dos-testes-no-react-native-foi-revelado/testing-10.png)

We want to test if everything went well with the component rendering. We can use the render itself for that:

```typescript
// components/Button/index.spec.tsx

describe('Button', () => {
  it('should render without crashing', () => {
    render(<Button onPress={() => {}} />);
  });
});
```

![Note about Jest tests](/images/posts/finalmente-o-segredo-dos-testes-no-react-native-foi-revelado/testing-11.png)

**NOTE:** Tests in Jest are run in a way that simulates native rendering, but are not actually run natively. This means you don't need a smartphone with the build installed to use it. Although this strategy brings several benefits, there are some downsides. The main one is being unable to verify the native modules used in the project, which often need to be mocked.

We can improve the verification of this component by checking whether the text is written as passed in the parameter, or whether there's an event on the button click. However, for that we'll need to isolate part of the element from our example component.

![Extracting elements by id and text](/images/posts/finalmente-o-segredo-dos-testes-no-react-native-foi-revelado/testing-12.png)

We can extract part of a visual element on the screen using Testing Library resources. The two most common ways are by id and text.

```typescript
// components/Button/index.tsx

interface ButtonProps {
  onPress: () => void;
}

const Button: React.FC<ButtonProps> = ({ onPress }) => (
  <TouchableOpacity testID="button-component" onPress={onPress}>
    <Text>Clique aqui</Text>
  </TouchableOpacity>
);

export default Button;
```

```typescript
// components/Button/index.spec.tsx

describe('Button', () => {
  it('should render without crashing', () => {
    const { getByTestId } = render(<Button onPress={() => {}} />);
    const button = getByTestId('button-component');
    expect(button).toBeTruthy();
  });
});
```

![Using getByTestId and getByText](/images/posts/finalmente-o-segredo-dos-testes-no-react-native-foi-revelado/testing-13.png)

To extract by ID we need to identify the element by the `testID` property and fetch it with `getByTestId('my-id')`, or by text we can use `getByText('text')`. If we write the id or text differently from what was expected, we'll see an error. This way, we can use `getByTestId` to verify if something is actually being shown on screen, or `getByText` to verify if something was written as expected and exists on screen.

![Verifying text with getByText](/images/posts/finalmente-o-segredo-dos-testes-no-react-native-foi-revelado/testing-14.png)

Knowing this, we can now write our test to verify if the text is being shown correctly:

```typescript
// components/Button/index.spec.tsx

describe('Button', () => {
  it('should render button text correctly', () => {
    const { getByText } = render(<Button onPress={() => {}} />);
    const buttonText = getByText('Clique aqui');
    expect(buttonText).toBeTruthy();
  });
});
```

![FireEvent from Testing Library](/images/posts/finalmente-o-segredo-dos-testes-no-react-native-foi-revelado/testing-15.png)

To simulate the button click, we'll use FireEvent from Testing Library. By default, there are three types of events already implemented: `fireEvent.changeText(...)`, used to change text in a TextInput; `fireEvent.scroll(...)` to scroll on the page; and `fireEvent.press(...)` to click on a `View`.

```typescript
// components/Button/index.spec.tsx

describe('Button', () => {
  it('should call onPress when button is pressed', () => {
    const mockOnPress = jest.fn();
    const { getByTestId } = render(<Button onPress={mockOnPress} />);
    const button = getByTestId('button-component');
    fireEvent.press(button);
    expect(mockOnPress).toHaveBeenCalled();
  });
});
```

![Simulating button click with fireEvent.press](/images/posts/finalmente-o-segredo-dos-testes-no-react-native-foi-revelado/testing-16.png)

![Complete test coverage](/images/posts/finalmente-o-segredo-dos-testes-no-react-native-foi-revelado/testing-17.png)

## Conclusion

In this post, we saw how to test a simple button component in a React Native application. The same can be applied to an entire application screen. The ideal is to write unit tests, component tests, and screen tests — which are the pages using the components. This way, we can verify that the integration works as expected, as well as that the components work correctly individually.

For those interested, the complete source code used in this post is in the GitHub repository.

I hope this post helps you on your next project. If your company needs help building mobile applications, get in touch!

---

Published by Tiago Danin. Free to quote with attribution and a link to https://tiagodanin.com.